
パンくずリストの作り方
はじめに
このページでは、ネチネチとコードを書いていきます。 結果のソースコードだけが知りたいのであれば、 「html完成コード」より見てください。
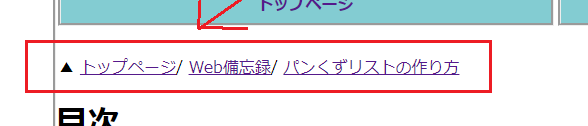
パンくずリストとは
このページの上部に表示されているものです。
 これは"ユーザが今どこにいるのかわかりやすい"だけではなく、
"クローラーがサイトを巡回しやすくなる"
という効果があります。
これは"ユーザが今どこにいるのかわかりやすい"だけではなく、
"クローラーがサイトを巡回しやすくなる"
という効果があります。
htmlで骨格を作る
step1
olタグを作る
<ol></ol>
これがパンくずリスト全体となります。
順番に意味があると思ったら、olタグで良いと思います。
大変申し訳ございません。適切なのは「olタグ」です。
それに伴い記事内のコードをulタグからolタグに変更致しました。ulタグでも正しく表示されますが、
パンくずリストは順番に意味があります(並べ替えたら意味がわからなくなる)ので適切なのはolタグとなります。
step2
あとで装飾するために
olタグにidを付ける。
(※1つのページに2つ以上パンくずリストを付ける場合は、classを付けましょう。
基本的に、1ページに1つで十分だと思います。)
<ol id="breadcrumb"></ol>
名前は何でも良いです。 今回は"breadcrumb"とします。 自分は"ぱんくず"と辞書で調べて決めました
step3
olタグに「itemscope」と「itemtype」 プロパティを追加する。
<ol id="breadcrumb" itemscope itemtype="https://schema.org/BreadcrumbList"></ol>
itemscope
→これはデータだよ!
itemtype="https://schema.org/BreadcrumbList"
→パンくずリストについての
つまりolタグは、 「パンくずリストについてのデータだよ」と(クローラーに)伝えています。 どんなデータかを示すのに、URLを使っているのが特徴的ですね!
他の情報について表したい場合は、 こちら(https://schema.org/docs/full.html) より探してください。 今回は右上の検索欄より 「パンくず」と検索し、 (出てきた検索結果をクリックしてくださいね!) そのサイトのurlをコピーして使っています。 今回のURLは、 「https://schema.org/BreadcrumbList」 ですね!
step4
olタグの中にliタグを入れる。
<ol id="breadcrumb">
  <li></li>
</ol>
step5
liタグに「itemprop」、「itemscope」「itemtype」プロパティを追加する。
<ol id="breadcrumb" itemscope itemtype="https://schema.org/BreadcrumbList">
 <li itemprop="itemListElement" itemscope itemtype="http://schema.org/ListItem"> </li>
</ol>
itemprop="itemListElement"
→パンくずリストの要素ですよ!
itemscope itemtype="http://schema.org/ListItem"
→パンくずのリスト項目が載ってるよ!
という意味です。
step6
liタグの中に、aタグを入れ、itempropプロパティを追加
<ol id="breadcrumb" itemscope itemtype="https://schema.org/BreadcrumbList">
 <li itemprop="itemListElement" itemscope itemtype="http://schema.org/ListItem">
  <a href="パンくずリストの一番左にくる項目のURLを貼ってください!" itemprop="item">
  </a>
 </li>
</ol>
今回のパンくずリストは一番左の項目から順番に作っていきます。
なので一番上の階層のURLを指定してください。
itemprop="item"
→パンくずリストの項目である
step7
aタグの中に、spanタグを入れる
<ol id="breadcrumb" itemscope itemtype="https://schema.org/BreadcrumbList">
 <li itemprop="itemListElement" itemscope itemtype="http://schema.org/ListItem">
  <a href="パンくずリストの一番左にくる項目のURLを貼ってください!" itemprop="item">
   <span></span>
  </a>
 </li>
</ol>
step8
spanタグにitempropプロパティを追加
<ol id="breadcrumb" itemscope itemtype="https://schema.org/BreadcrumbList">
 <li itemprop="itemListElement" itemscope itemtype="http://schema.org/ListItem">
  <a href="パンくずリストの一番左にくる項目のURLを貼ってください!" itemprop="item">
   <span itemprop="name"></span>
  </a>
 </li>
</ol>
itemprop="name"
→これ(spanタグ)には項目の名前が載っているよ。
step9
spanタグの中に、項目の名前を書く
<ol id="breadcrumb" itemscope itemtype="https://schema.org/BreadcrumbList">
 <li itemprop="itemListElement" itemscope itemtype="http://schema.org/ListItem">
  <a href="パンくずリストの一番左にくる項目のURLを貼ってください!" itemprop="item">
   <span itemprop="name">
    ホーム
   </span>
  </a>
 </li>
</ol>
今回の項目名は「ホーム」にします。
step10
liタグの1つした(aタグの外)に、metaタグを入れる。
そして、metaタグに「itemprop」、「content」プロパティを追加
※位置に注意してください
<ol id="breadcrumb" itemscope itemtype="https://schema.org/BreadcrumbList">
 <li itemprop="itemListElement" itemscope itemtype="http://schema.org/ListItem">
  <a href="パンくずリストの一番左にくる項目のURLを貼ってください!" itemprop="item">
   <span itemprop="name">
    ホーム
   </span>
  </a>
  <meta itemprop="position" content="1">
 </li>
</ol>
meta itemprop="position" content="1"
→このliタグは一番上の位置(階層)にくる項目ですよ
という意味です
変更する部分を確認
ここまでで、パンくずリスト項目の1つが完成しました!
ここからはほぼ同じコードですので、コピペします。
変更しなければならないのは、
だけです。
ここまでのことを少しまとめると、 「パンくずリストの項目であるということを(クローラーへ)伝えるために、 パンくずリストの中にあるタグには、itempropプロパティを追加しなければならない」 ことを意識しておきましょう。
step11
先ほど作ったliタグのカタマリをコピペして、貼り付け 先ほど上げた3つを変更する。
html完成コード
このページ上部にあるパンくずリストのコードとなります。
<ol id="breadcrumb" itemscope itemtype="https://schema.org/BreadcrumbList">
<!-- 1つ目のパンくず -->
 <li itemprop="itemListElement" itemscope itemtype="http://schema.org/ListItem">
  <a href="https://toke-computer.club/" itemprop="item">
   <span itemprop="name">
     トップページ
   </span>
  </a>
  <meta itemprop="position" content="1">
 </li>
 <!-- 2つ目のパンくず -->
 <li itemprop="itemListElement" itemscope itemtype="http://schema.org/ListItem">
  <a href="web_top.html" itemprop="item">
   <span itemprop="name">
     Web備忘録
   </span>
  </a>
  <meta itemprop="position" content="2">
 </li>
 <!-- 3つ目のパンくず -->
 <li itemprop="itemListElement" itemscope itemtype="http://schema.org/ListItem">
  <a href="howto_breadcrumb.html" itemprop="item">
   <span itemprop="name">
     パンくずリストの作り方
   </span>
  </a>
  <meta itemprop="position" content="3">
 </li>
</ol>
念のため こちら にコードを貼り付けて、構造化テストをしてください。
cssで装飾する
正直cssには自信がないので、 こちらのサイトを参考に作りました。 完成コードはこちらです。
#breadcrumb{
  display:flex;
  list-style:none;
  padding-left:3px;
}

#breadcrumb li::before{
  content:'/';
}

#breadcrumb li:first-child::before{
  content:"▲";
}
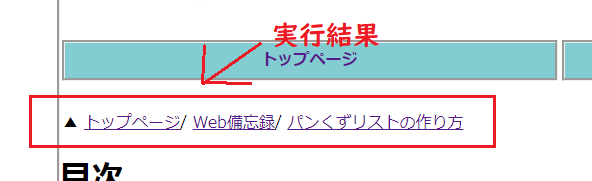
実行結果
最後に
クローラーのための記述が面倒ですわ。